Developing Black & White Goodness

Freakin' black and white film photography has been good for soul lately. Not caring about the color temperature around me matching the film in my camera has been a nice change, plus I'm also diggin' the fact that a roll of Ilford HP5+ is nearly half what I was spending on Portra 400.

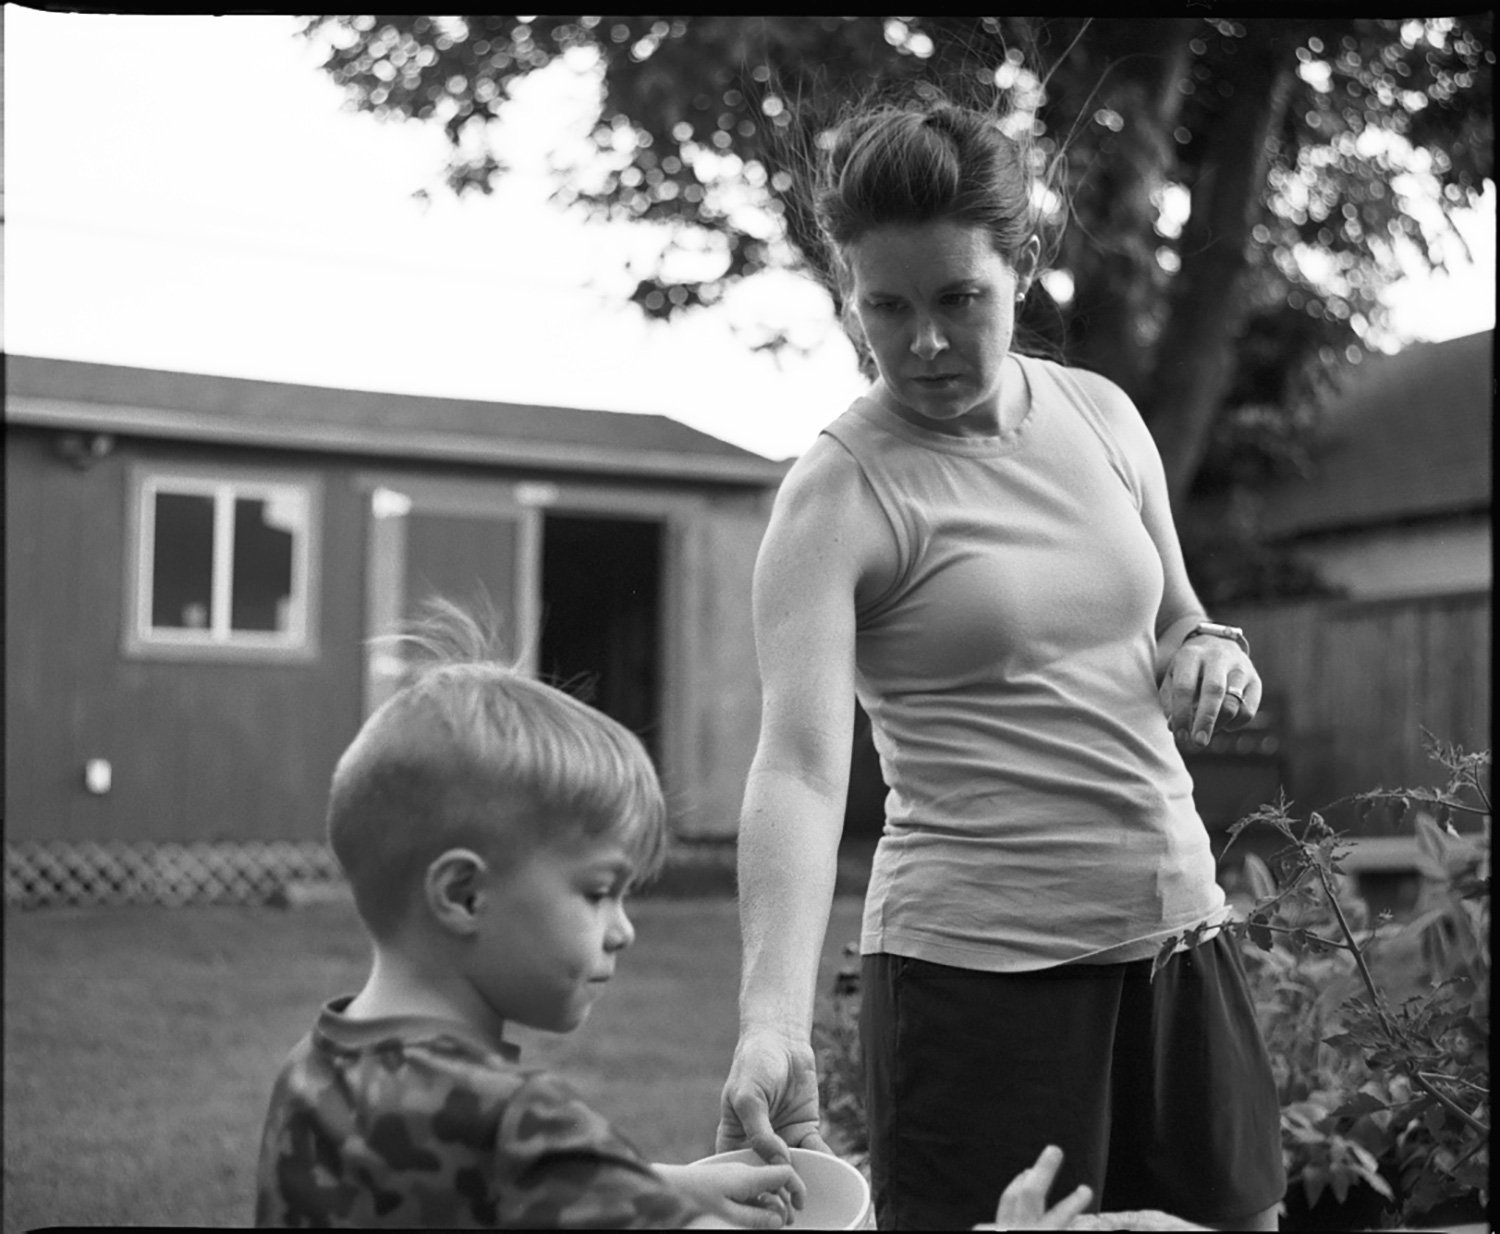
My first legit experiences behind a camera go back to high school me. Back then I spent most of my time in the band room and/or trying to keep up with my honors classes, but then there's that one photography class I took that ended up being the most related to what I do for a living. Not sure where I got the camera, but we shot our assignments on 35mm black and white (B&W) film that we later developed and printed in the school's darkroom.

The fact I really don't know if the images I'm trying to make will actually turn out or not is pretty great. My 1970's era Mamiya RB67 Pro-S smells like an old car and doesn't have a light meter. Sometimes I'll do test shots with my DSLR to dial in shutter and iris settings. Sometimes I'll lean into my handheld Sekonic light meter to do the thing, but then again shooting film is all for naught if you screw up the developing part. I've got a growing binder of color and B&W negatives I've shot since getting my film camera and can honestly say there's only a handful of images in there I'm proud of. In our world of instant gratification, forced patience is a good thing.

Back in May I was in New York to film an abortion rights protest and came home with five rolls of Ilford HP5+, some powdered Kodak D76 developer and fixer, plus a small bottle of concentrated Kodak liquid stop bath. I'd had a good experience with powdered C41 chemistry before and knew the powdered form would have a longer shelf life. Plus I didn't want to chance big bottles of liquid spilling out and destroying the other gear and actual livelihood packed away in my checked gear cases while in transit.

For my C41 film processing, I already had a Paterson developing tank, dark bag, and some other misc. bits. I keep my color chemicals in one liter dark amber glass bottles, but opted instead to get those accordion style plastic bottles for my B&W goodies. So far I'm more impressed with those plastic bottles seeing as how they're less likely shatter and they can squish down to keep out excess air (and oxidation) to help extend the chemistry's shelf life.

Most of the internet told me not to try and break up the dry chemistry batches into smaller quantities, but they're not the boss of me. A couple other rebels let me in on their secrets and I too broke up my gallon batches of D76 developer and fixer. Make sure you're prepping your chemistry in a well ventilated area so you're not losing a lung like this hero. Be smart too and wear rubber gloves, a mask, and avoid doing this nonsense in the same place where you prep food.

There's tons of B&W developing tutorials online. For some reason they all seem to not get along or agree like those nice hipster kids doing their thing with C41 color developing. I kinda mixed and matched what I could find considering the film stock and the chemistry combination I'm using.


DEVELOPING B&W FILM

ALL CHEMISTRY NEEDS TO BE AT SIMILAR TEMPS

PRE-SOAK
Agitate for :60
Dump out
Rinse
Dump out

DEVELOP (stock)
Agitate first :30
Invert 4x every :30 & tap out bubbles
Developer back to storage container for reuse

STOP BATH
Agitate for :60
Stop bath back to storage container for reuse

FIXER
Agitate first :30
Agitate & invert every :30 for 5 mins & tap out bubbles
Fixer back to storage container for reuse

RINSE
Rinse film for 5 mins with room temp water


DEVELOP TIMES (STOCK)

Ilford HP5+ & Kodak D76

ISO TIME TEMP
400 5:05 75° F
800 7:07 75° F
1600 9:29 75° F
 

The one thing most agreed on was using The Massive Dev Chart website to work out and match up developing times and temperatures. According to the website, you're supposed to process Ilford HP5+ at 68°F with your Kodak D76. But it's summertime here and during these months our house never gets below mid-70°s. Again, thank goodness for Massive Dev Chart because it's got a conversion option to help do what you need done. I'm using my developer at stock vs. diluting it – at least at this point. I'd shot a couple of my rolls at the box speed 400 ISO, then the others pushed to 1600 ISO. Again, Massive Dev Chart came in clutch with the help in developing.

Another thing I found out in doing my B&W goodness is that my scanner is jacked. I've got an Epson V600 that I've been using for a bit, but turns out I've also got the magenta line curse like a ton of other people on the internet. For the longest time I thought my film back was scratching my negatives. But no. It's thanks to supposedly dirty sensors that this dude on YouTube was able to fix. I did the thing and cleaned the sensors on my V600, but it didn't help like it did the other film bros lurking in the video's comment section. Looks like I'll have to reach out to Epson and work out warranty stuff.

DIY Film Developing

So back to this whole "shooting film" nonsense: I'm a fan. At this point it's more along the lines of having unprotected sex and just "hoping for the best." Sure, it's super exciting to do the thing, but the risk of incorrectly metering your light is incredible lower than a surprise family addition or a weird rash. There's also the the thing about not waiting nine months for your film to be processed. I could go on, but I'll just snip the analogy here and now.

Unfortunately Oklahoma City isn't teeming with photo shops and getting film developed isn't as easy as it would be in a larger market. Buddies of mine ship their film out to be processed, but they're better people than I am. Turns out in this situation I'd rather have the one marshmallow now instead of eating both later. The photo lab I'd stared using here in OKC to develop my film ran into some substantial delays and I started down the rabbit hole of developing my own color film at home. As a high school student twenty-something years ago, I'd taken a photography course and developed black and white film. We never did anything with color film, but it's the future now and I'd figured there'd be a YouTube tutorial or thirty that'd get me up to speed.

Thanks to the internet I put together a film processing kit plus the confidence to not blowup my house. Willem Verbeek's YouTube videos on developing were key in me actually gaining the confidence to try and pull it off, but Will Cobb's in-depth video was crazy helpful with the nuts and bolts of the process.

The worse part was waiting for the $200-300 in gear I'd ordered off Amazon to be delivered. There was a problem with the first round of plastic reels included in my Paterson kit being defective, but I was able to work out a hack while waiting for those to get replaced. I'll say too the amount of developing chemicals I'd ordered was twice as much as intended (got the two liter Unicolor kit instead of one liter) and the recommended bottles were smaller than I should've gotten (the four pack of 32oz dark amber glass bottles vs. an accordion style solid plastic bottle). Thankfully I can do basic math and use a calculator to split the chemicals in thirds to make the mismatched puzzle work.

It was nerve-racking getting used to spooling the film negatives by feel alone in a dark bag. Some of the tutorials I'd watched had dudes sacrificing an unused roll of film but I didn't want any part of that $12-15 of nonsense. I got somewhat comfortable with the spooling process after practicing in the light and then the dark bag with some previously developed negatives I already had. Those botched plastic reels – even with the hack – ended up creasing a few sections of my negatives and added some "character" to a few frames. Thankfully though most of the rolls I developed came out pretty well, especially considering how I'm just getting started. There was one roll I'd hoped to get more from that turned out a bit sour; pretty sure I'd botched the developing time on that one. Still, not bad in terms of the collateral damage I expected early on.

At this point I'm something like 6-8 rolls into developing my own film and it's much less daunting than expected. The startup costs weren't nothing, but considering how much money I was spending having someone else do it I'll end up ahead here pretty soon. I figure too the time I'm saving doing it myself will help with the learning curve of shooting on film.

I knew I'd not be getting the same results I'm used to from my digital cameras, but this is something else. This old film camera is making things interesting and I'm crazy impressed with the unpredictability and character of the images I'm getting. There's also this thing of the inherent mood and color that comes along with the film negative compared to digital. There's an annoying camera scratch on my negatives due to something scraping along the negatives in my film back. I've still not figured out what it is, but Photoshop fixes are working till I get the problem solved.

My old-school Mamyia RB67 doesn't have a built in light meter, so in order to figure out exposure I've been using a combination of a handheld light meter and my Canon DSLR. I'll do an initial light reading with my incident meter and then a test shot with my digital camera to help dial settings in. The Sekonic meter I currently have doesn't include a spot meter, so I'm sure I'll upgrade in time.

It's easy to get lost in trying to correct and grade the different images, especially if you're trying to match multiple shots. The time I'm spending scanning my negatives and dialing in the colors to look the way I'm wanting will only help my color correction and grading for paid work.

This dip into the world of film photography has been super interesting to me as a digital cinematographer. Watching how some of the film photographers I've been following expose their images has been refreshing compared to my near reflexive habits and digital workflows. It's wild seeing more and more images from film photographers that I'd normally consider overexposed compared to the dark and moody frames from my cinematography brethren.

Over time all this nonsense will work its way into how I make a living. Even this early on I'd feel much more comfortable approaching the idea of shooting motion film stock. I know St. Anne the Wife and I have had a couple different conversation about some of the money I've pumped into this thing. By no means is it crazy money, but surely it's a much more cost-effective mid-life crisis compared to the spandex clad buddies of mine and their deep dives into road racing.

DIY Tube Light Case

It's been a bit quiet around this part of the website the last few weeks. I'm neck deep in an edit for a project I directed/DP'd a couple of weeks ago and I'm prepping for another shoot in NYC this coming weekend. Turns out there's only so much time in a day.

That being said, I did manage me work out a DIY PVC pipe case for my two Astera Titan tubes. There aren't a ton of case options for LED tube lights unless you've got quite a few of them. I've been looking for case options for individual tubes that could fit in another case vs. dedicated cases that would just be an additional checked bag for flights and/or one other case I'd be lugging around on shoots. I've been using the cardboard tubes the lights ship in, but they got rained on during a shoot and quickly started coming undone.

210510-03.jpg

Astera has a fancy $1,500 case for their Titans that's super nice, but it holds eight LED tubes, is heavy AF, and tough to travel with. They've also got a soft case, but it's not a good fit for what I'm looking to do. Hot Rod Cameras has a custom case for Quasar tubes, but again, I'm not looking for an additional, dedicated case that'd most likely end up costing me more in checked baggage fees than if I'd just rented at the destination.

Surprisingly, the Google searches for "DIY tube light case" were more about building your LED lights which is something I'm not even close to wanting to do. There are tons of YouTube videos for DIY PVC pipe cases for fishing rods, so I figured that'd work. Freakin' kudos to the YouTubers and the rest of the internet for making step-by-step tutorials for the rest of us to follow. If I hadn't been rushing to get these done in between my normal work day and family responsibilities, surely it'd have made for a useful resource.

For this project I used a 2" wide PVC pipe and glued a fixed cap on one end and a screw top setup for the other. The pipe came in 5-6' pieces, so after working out the measurements with the Titan tubes, I hacksawed them down to 41" long and sanded off the painted and raised labels on all the parts. For the interior padding, I glued 2" of dense foam to the interior end of the closed/fixed cap. I also ended up making something like a sock to put over the light so it doesn't get scratched and banged up once it's inside the rigid case. There's a bit of extra fabric on the open end of the sock to act as additional padding to keep the whole thing snug once the cap is screwed on.

All in I think I've spent about $50 on parts, so that's like $25/case. They haven't traveled or been on a working set with crew yet, so I'm curious as to how they'll work out. If I were to do it again, I'd like to find a bit thinner walled PVC pipe and not be as messy with the purple primer/glue process. The sock is made out of some fleece-type fabric my mom and I scrounged from her sewing room. I'm hoping the seams hold and the fabric doesn't stretch too much. The DIY PVC cases are close to the same length and diameter as the cardboard tubes I've been using, so it's not a problem to fit them in my 48" Tenba stand case. I'm planning to also get a couple of C-stands with turtle bases to go in the same case to make for a travel-friendly, battery-powered interview lighting setup.

UPDATED 6/1/21
Traveled back and forth to NYC in mid-May with these DIY PVC cases. The lights did fine and were packed in that long case with a couple of C-stands with turtle bases. The case did get a bit heavy but was still under 70 lbs, even with a 15lb sandbag.

The TSA did go through and open both PVC pipes while in the screening process on my flights out and back. They left their handy dandy "TSA Screening" note inside the main case and I could tell they'd pulled the lights out of their blue socks. No harm, no foul, and they lived to fly another day.